Griffin Effects
Choosing the right soldering iron:
The goal of soldering wires together is to create good electrical contact without damaging the parts you are soldering together. Some things require a lot more heat than others, and some things you might want to solder together may be fairly delicate. The technique for soldering is pretty much the same no matter how you plan to do this, but the heat factor can make the difference between a good connection and a 'cold solder joint'. For effects pedal repair/building, you will want a soldering iron with a wattage of 25 - 30. If you have a soldering gun (usually 100 watts or more), this is good for heavy wire (14 gauge or thicker), but typically will ruin many of the connectors, wire and components that you might be trying to solder in effects pedals. There are many soldering iron options out there ranging from hundreds of dollars to a few dollars. Sometimes you can get the cheap ones for less than a replacement tip. They usually look something like this:

It's best to get one that has a grounded plug. This will help prevent a charge buildup and ruin static sensitive components. Even better is to get a temperature adjustable iron so you can adjust the temperature to the thickness and melting point of your solder. There is usually a set screw on the soldering iron that holds the tip in (some models also have tips that screw in). You must keep the tip tightly attached to the iron - the tip will work its way loose over time & you may be forced to tighten it while its hot - have pliers and a screw driver handy to do this, otherwise the tip will not heat up enough to melt the solder.
When you work with electrical circuits use solder that is - 60% tin 40% lead and has a Rosin core (there are others that have 63% tin and 37% lead - these have a lower melting point and are excellent for this purpose). Do not use acid core solder - it can corrode things and may damage the thing which you are trying to repair.
Getting Started:
NOTE: Never attempt to solder any circuit to which power is applied. The damage to the equipment could be severe and you may get electrocuted. Always check to make sure any cables are unplugged and if the thing you are repairing is battery operated, that the battery is removed. If it plugs into a wall outlet, make sure it is unplugged and if you can unplug the power from the device you are working on, do that too.
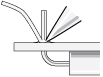
The soldering iron tip must be clean and covered with a shiny silvery surface. Keeping this area shiny is called "tinning" it. The shiny silvery part is where the heat transfer will take place. When the soldering iron tip has warmed up, the solder quickly oxidizes - gaining a thin skin that is not a good conductor of heat - it is easy to keep clean - wiping the tip on a damp sponge often will take care of this. After cleaning, touch the tip with end of a piece of solder. The solder should melt instantly and form a clean bright layer over the copper. Apply only enough solder to form this "Tinned" coating. Wipe off any excess.
Most Soldering iron tips are made of copper, or have a copper coating that can be "tinned". You'll find over time that the copper surface gets worn (the solder actually takes a little with it for each connection soldered), and you should replace the tip when it gets worn.
Surfaces to be soldered must be clean, free from water, dirt and any grease. I use fine sand paper/emery cloth to clean connections. Never use steel wool to clean with - small pieces of it can get lodged in places causing short circuits.
When soldering wires, you must first remove the insulation from the end of the wire. I use a wire stripper for plastic insulation.
If working with wire, "Tin" the wire you just cleaned. To do this, put the cleaned wire up against the Soldering iron tip, getting a good mechanical connection between the "Tinned" portion of the Soldering iron tip and the wire and rub the end of the solder against the wire (not the Soldering iron tip). Place only as much as is needed to make the end shiny. If it is stranded wire, make sure that the solder flows thru completely for at approximately 1/4 of an inch (6mm), but not up into the strands that are into the plastic insulation.
Solder comes in a few different thicknesses. I prefer to keep at least two sizes - A very thin rosin core solder around .8mm ( it allows me to easily control the amount of solder applied to any joint and is excellent for small solder pads) and a 1.2mm rosin core solder for almost everything else. You can use whatever size solder you are comfortable with. Just remember that controlling the flow of solder is important and it's harder to do that with thicker solder. When connecting a wire to a another wire or a terminal, try to make a good mechanical connection by hooking or twisting the two pieces together.
Soldering Components:
1. Carefully bend the components leads to fit the holes on the board. You do not want to disturb/break the components shell or you can damage the component.
![]()
2. Insert the component, observing any special orientation it may require. Try to keep the leads of the component straight and try not to bend them. If the component moves or slides out of the holes, you can use some tape on the component to hold it in place. You can also bend one leg of the component over and that should hold it in place. Then when you soldered the leg that is straight, straighten the leg you bent and solder that one in place.
3. Wipe the tip clean and tin with a small amount of solder.
4. Heat the joint by placing the soldering iron's tip against both the component lead and the circuit board solder pad.

5. After a moment of heating, wipe the solder across the lead and pad only. If the solder is touched to the iron it will blob up. When the solder flows, hold the tip in place for another moment. Remove the iron without moving the part or board and let the joint cool. Don't heat the connection any longer than necessary or apply any more solder than necessary to get a good shiny and clean solder joint. If the solder joint does not shine, or it balls up, its possible that it did not connect the parts together. Its probable that the surface of one of the items being soldered was not clean or did not receive enough heat. You can try to quickly reheat the joint. If you allow a bad solder connection to occur, the joint will eventually develop a high resistance and develop into a 'Cold Solder Joint'. Never "Blob" the solder on, these sort of connections frequently fail over time.
6. Trim the excess lead off with a small pair of wire cutters. Be carefull not to pull if it doesn't cut through all the way. You can pull the solder pad off of the circuit board.
7. Inspect the joint. A good solder joint blends the lead and pad smoothly together, and has a cool, smooth, bright finish. If the joint looks like a ball, a blob, if it bulges or bridges to other pads, remelt it and remove the excess solder with the soldering iron. If the joint looks fuzzy or dull it is a "cold" solder joint. Remelt it and let it cool (without moving) to a smooth, bright finish.
8. Clean off the Soldering iron tip between connections. The surface will oxidize quickly and make for poor connections if you don't.
Soldering Tips:
A small Soldering iron is all that should ever be used on a printed circuit board. The copper that is bonded to the circuit board is fairly heat sensitive as are many of the components mounted on the circuit board. Never use a Soldering Gun on these. If you do, the odds are good that the copper traces will come right off - you may be able to repair this sort of damage with tiny pieces of wire, but you are better off not damaging the circuit board in the first place.
Don't be in a rush. It's better to take your time and make good solder joints than to rush and make sloppy ones. The extra time spent making good, clean solder joints and inspecting each one is a lot better than the time spent searching for what went wrong.
Sometimes solder pads are really close together and solder spills over onto the next pad. This is fine as long as the solder pads are connected by a trace. If the solder pads are not connected by a trace, this will more than likely cause the circuit to malfunction. Take the time to look at the traces around the solder pad you are soldering before you solder it.